


 中文简体
中文简体 English
 한국어
한국어 日本語
日本語 русский
 Español
 عربى
عربىIndustry News
Home / News / Industry News / How to Cook Hard Boiled Eggs Perfectly: Time, Temperature, and Peeling Tips

Sep 09, 2026
Content
Cooking hard boiled eggs perfectly sounds simple, but it fails more often than almost any other kitchen task. The whites come out rubbery, the yolks develop a gray-green ring, or the shell refuses to let go without tearing chunks of white away. After years of developing kitchen appliances and studying how heat moves through food, we have learned that the difference between a good egg and a frustrating one comes down to three controllable variables: heat management, timing, and rapid cooling. Once you understand those variables, the same result can be reproduced every single time. You do not need a chef's intuition or a drawer full of gadgets; you only need a consistent method, a timer, and cookware that holds heat without creating hot spots.
This guide covers the science, the step-by-step routine, the peeling problem, and the practical equipment choices that make hard-boiled eggs work in both home and commercial kitchens. The core message is simple: perfect eggs are the result of a controlled temperature curve, not a long boil.
Perfect hard-boiled eggs are not about luck; controlling heat, time, and cooling gives you identical results batch after batch.
Egg white is mostly water and protein. The white proteins begin to set around 60°C (140°F), and the yolk proteins thicken in a slightly higher range, around 65°C (149°F) and above. If the egg is held above 70°C for too long, sulfur compounds from the white react with iron from the yolk and create ferrous sulfide, which appears as the familiar gray-green ring. The solution is not to avoid heat but to control exactly how much heat reaches the center of the egg and when to stop the process.
Doneness is not determined by a single number. The temperature inside an egg rises gradually, and the texture changes as the yolk reaches different temperatures. A short hold leaves the center soft and creamy; a longer hold firms the center completely. Beyond a certain point, texture keeps degrading even though the egg looks fine. This chart shows how time at a gentle cooking temperature translates into texture.
For soft-cooked eggs, the white is set enough to hold its shape, but the yolk remains liquid and rich. At the medium stage, the yolk becomes jammy, with a slightly soft center that spreads easily. Hard-cooked eggs have a fully firm yolk that stays bright yellow if the temperature is controlled. The chart also shows why small timing errors produce dramatically different results. An extra minute can push a soft yolk into a gummy stage; two extra minutes can create the beginning of a gray ring. Size matters as well, because a large egg takes longer to come up to temperature than a medium egg. Altitude also changes boiling behavior, which is why we recommend a covered rest rather than an active boil. The shorter the hold time in the chart, the more sensitive the egg is to temperature fluctuations. For perfect texture, we need to stop heating at the right moment. That is why every serious cooking appliance we design has to deliver stable, even heat rather than a single high-power burst. Once you see the time ranges as windows, not fixed numbers, the whole process becomes easier to adjust for your own kitchen.
The ideal hard-cooked egg keeps a bright yellow center; gray-green color means the yolk overheated.
The most reliable method is the cold-start, covered-rest method. Place eggs in a single layer in a saucepan, add enough cold water to cover them by about 2.5 centimeters (1 inch), and set the pot over medium-high heat. Bring the water to a full boil, then immediately cover the pot and remove it from the heat. The residual heat in the water and the pot finishes the cooking gently. Do not leave the pot boiling, because rolling water makes eggs bounce against each other, which can crack the shells and leak white.
Use the table below as a starting point for large eggs. Timing begins as soon as you remove the pot from the heat.
| Texture | Rest time | Yolk condition |
|---|---|---|
| Soft | 6-7 minutes | Liquid and glossy |
| Medium | 9-10 minutes | Jammy and slightly soft |
| Hard | 12-13 minutes | Firm and bright yellow |
When the rest time finishes, move the eggs to an ice-water bath and leave them for at least 5 minutes. The ice bath stops carryover cooking and also makes peeling easier by helping the egg white contract slightly. If you are cooking at high altitude or using extra-large eggs, add one to two minutes to the rest time. If you prefer a firmer white but a very creamy yolk, go on the lower end of the hard range and test until your altitude and pot produce the same result every time.
Always start eggs in cold water, cover the pot, and let residual heat finish the cooking while a timer keeps you honest.
Freshly laid eggs have an albumen that clings tightly to the inner membrane. As an egg ages in the refrigerator, it absorbs air, its pH rises slightly, and the membrane separates from the albumen. That is why eggs that are a week old usually peel far more easily than eggs that came from the farm that morning. The shell itself is not the problem; the membrane is.
If you only have fresh eggs, change the cooking method. Gently steaming eggs yields a more uniform white, and the steam creates small pockets that make the shell release more easily. The table below compares the two approaches so you can choose the one that fits your kitchen.
| Water-boiled eggs Familiar and easy to monitor. Shells tend to stick when eggs are very fresh. Works well with older eggs. |
Steamed eggs Easier peeling with fresh eggs. More even heat for batch cooking. Requires a steamer or a saucepan with a rack. |
A longer ice bath also helps. After steaming or boiling, let the eggs rest in cold water for 8 to 10 minutes. Then tap the shell gently on the counter, roll the egg under slight palm pressure, and peel under running water or in the water bath. The water washes away shell fragments and reduces the chance of tearing the white.
If you want eggs that peel easily, use slightly older eggs or cook them with gentle steam, then cool them quickly.
When the recipe changes from four eggs to twelve or twenty-four, a saucepan becomes less practical. Crowded eggs heat unevenly, and the ones touching the bottom can overcook before the center of the pot catches up. Steaming is the more repeatable route for batch cooking. Steam surrounds every egg with the same temperature, and a covered steamer keeps the environment stable from the first egg to the last.
For hard-cooked eggs in a steamer, bring the water to a boil, place the eggs in a single layer on the rack, cover, reduce the heat to a gentle steam, and set a timer for about 13 minutes for large eggs. Transfer the eggs to ice water immediately. The same sequence works for meal prep and commercial kitchen trial batches.
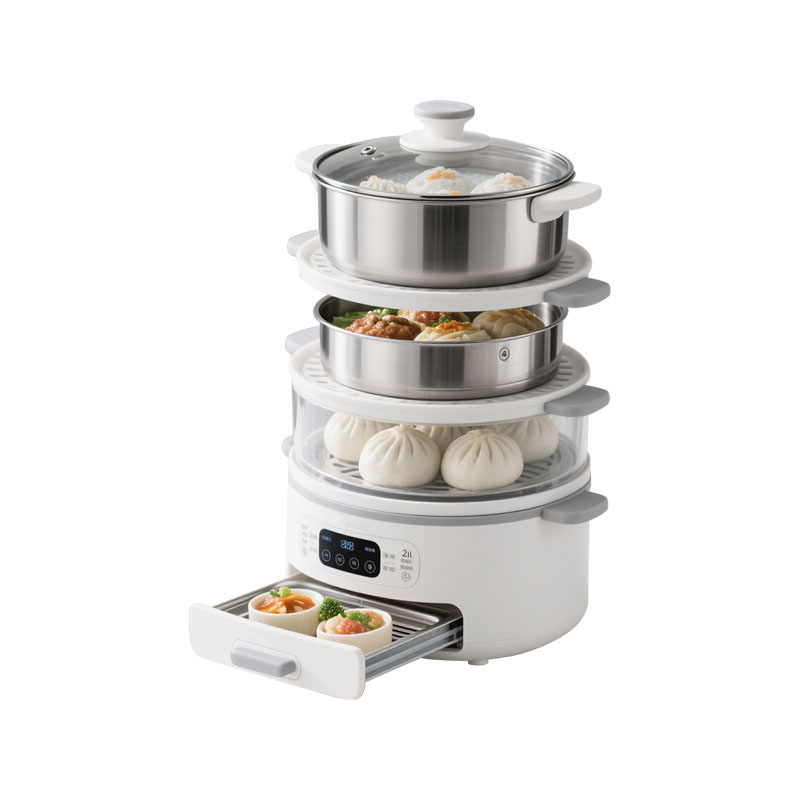 304 Stainless Steel Steamer Pot with Split Design and Precise Temperature ControlThis two-tier stainless steamer suits bulk egg cooking by distributing steam evenly and maintaining steady heat. Its split design allows steaming and boiling simultaneously, while the anti-dry protection and timer features support consistent results for meal prep or test batches.View Product →
There is another advantage of steaming: no rolling water means fewer cracked shells and no leaking white. That translates into less waste and a cleaner presentation, which matters when you are serving eggs by the tray. From a manufacturing point of view, we look for a steamer that distributes steam evenly and maintains a steady temperature, because those are the two variables that determine whether every egg matches the test batch.
Steaming is the most repeatable method for cooking more than six eggs at once.
The pot you choose affects how easily you can control temperature. A wide, heavy pot spreads heat across the bottom and allows the eggs to sit in one layer without piling up. A pot with a tight-fitting lid prevents steam from escaping and makes the covered-rest method more predictable. Thin pots create hot spots that can crack shells before the protein firms.
For stovetop cooking, a magnesium alloy pot offers fast and even heat transfer with a lighter weight than traditional heavy pans. Magnesium alloys are used in our own cookware line because they reduce hot spots and recover heat quickly after the lid is opened. That kind of stability is useful when you are repeatedly boiling eggs for a breakfast service.
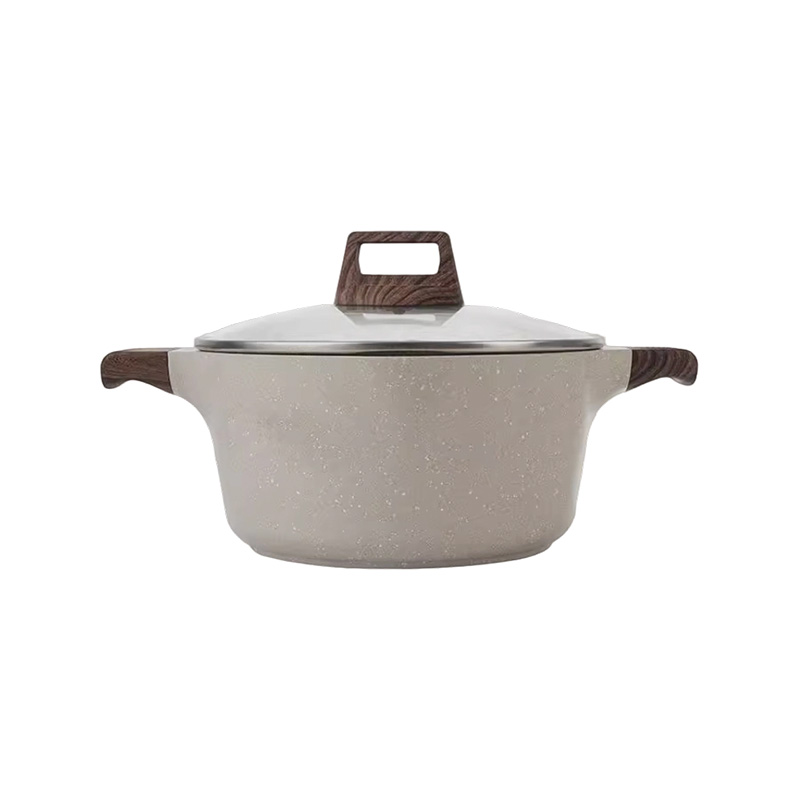 Magnesium Alloy Pot with Ceramic Coating for Fast, Even HeatingThis lightweight magnesium alloy pot provides quick heat recovery and even distribution, reducing hotspots during stovetop egg boiling. Its transparent glass lid lets you monitor cooking, and the wear-resistant ceramic coating supports repeated use in busy kitchens or bulk breakfast preparation.View Product →
If you mainly cook eggs in bulk, a stainless steel steamer pot with a large basket gives more consistent coverage than a standard saucepan. Stainless steel is easy to sanitize, which also matters for ODM and OEM clients who need equipment that meets commercial kitchen standards. No matter which option you choose, match the pan diameter to the batch size so the eggs stay in a single layer.
Choose a wide, thick pot with a tight lid and let the batch size decide whether water or steam is the better cooking method.
Most failed eggs come from the same handful of errors. The list below is based on what we see in our own test kitchen and what home cooks repeat most often:
Each of these problems is preventable with the same basic discipline: cold start, covered rest, timed removal, and quick cooling. If you change one thing today, add the ice bath to your routine. It is the cheapest control measure in the entire process.
The most important fix is rapid cooling; it stops the cooking process and changes how easily the shell releases.
Start with cold water, bring it to a full boil, cover the pot, turn off the heat, and let the eggs rest for 12 to 13 minutes for large eggs. Then move them to an ice bath for at least 5 minutes. This creates a bright yellow yolk and easy-to-peel shells.
The answer depends on the texture you want. For soft-cooked eggs, rest them for 6 to 7 minutes after the water boils. For a jammy center, use 9 to 10 minutes. For firm hard-boiled eggs, use 12 to 13 minutes, followed by an ice bath.
Fresh eggs have a tight membrane that sticks to the white. Using eggs that are several days older, steaming instead of boiling, and cooling them in ice water all make peeling easier. Peeling under running water also helps separate the shell from the white.
Yes. Place eggs in a single layer over boiling water, cover, and steam for about 13 minutes for hard-cooked eggs. Steaming gives more even heat and makes fresh eggs easier to peel than water boiling.
The gray-green ring is caused by holding the egg at too high a temperature for too long. Remove the eggs from the heat after the rest time, cool them immediately in ice water, and do not leave them in the hot pot while you prepare other food.
Use the covered-rest time rather than a continuous boil, and cool every batch immediately for consistent, bright results.
Ningbo Victor Electrical Technology Co., Ltd. (also operating as Victor Electric Appliance Technology Co., Ltd.) designs and manufactures kitchen appliances and magnesium-aluminum components for ODM and OEM clients. Our product range includes steamers, waffle makers, grills, coffee machines, and magnesium alloy cookware. If you are evaluating a supplier for a new kitchen appliance project, you can review our quality system and manufacturing capabilities on the page below.
We developed the method described in this article because consistent heat and repeatable timing are exactly what a well-built kitchen appliance should deliver. The same mindset applies whether you are cooking one egg for breakfast or designing equipment for a commercial kitchen.
Reliable cooking results start with equipment that holds heat evenly and a process that follows the same temperature curve every time.
Follow our social media to learn more about our updates


+86-13805815092

No. 11 Beihai Road, Xinqi Street, Beilun District, Ningbo City, Zhejiang Province, China
